OnPing Alarms : an Overview

Introduction #

This document is intended to explain how to implement Alarms in OnPing. 

OnPing is a monitoring and alerting solution that allows users to monitor IT environments, receive notifications, and respond to alarms in real-time. It leverages artificial intelligence and machine learning to detect anomalies, provide insights into system performance, and alert users when an event happens. OnPing can be used to monitor both on-premise and cloud-based systems, and its platform can be customized to fit the needs of any organization.

Using Alarms in OnPing #

Alarms can be used to alert operators when a machine is malfunctioning, nearing a critical temperature, when maintenance is needed, to monitor performance, to ensure worker safety, among other situations. 

The benefits of using alarms in OnPing are implementing features such as: multiple user alerts, predetermined time setting, delayed alarm setting, automatic triggering when conditions are met, dynamic and detailed monitoring control, alarm integration with other systems, and more detailed in this document.

Creating an Alarm #

To create an alarm in OnPing, begin by clicking on the bookmark, locating the ‘Alarm Creator’ menu panel, and clicking the ‘Add Alarm’ button. Next, fill out the alarm name, active settings, alarm times, permission settings and call order. Choose a math name from the mask set to interpret the data into a true or false alarm and select the data source. Then, use the ‘use custom name’ option to customize the alarm message and click “save alarm.” The alarm will be successfully saved and ready to be used.

Step 1: Open Alarms Panel

Navigate to the top right corner of the OnPing window and click the bookmark icon on the toolbar.

A dropdown list will appear displaying options to view other tools in OnPing such as Alarms, Masks, Data Analysis, Parameters, Maps, and User Reports. Select the option ‘Alarms’ to go to the alarm customization menu.

On the left side of the OnPing window, select the ‘Alarm Creator’ panel from the dashboard to create a new alarm.

Step 2: Create a New Alarm

Click the green ‘+ Add Alarm’ button to create a new alarm. 

The alarms creator menu will open prompting for additional information about the alarm such as: alarm name, settings, times, permissions, call orders, mask name, and parameters. All of these customization options are defined in more detail later in this document.

Step 3: Name the Alarm

Name the alarm by typing into the ‘Enter Alarm Name’ text bar. In this example, the alarm name will be used to indicate a status failure so the name of the alarm is labeled ‘Run Status Failure’.

Configure the alarm settings by clicking the checkboxes next to the settings options listed to the right of the alarm name. 

Active will activate or deactivate the alarm and indicate whether the alarm will call or not call. Use Custom Name allows the user to use a more controlled name than the alarm name. This enables the user to describe more accurately what the alarm is indicating by removing the location in the alarm name notification. Enable Clear Calls allows the user to clear the alarm calls.

In this example, ‘Enable Clear Calls’ is checked as default.

Step 4: Configure the Alarm Times 

Configure the alarm times by typing in the values in the text bar for the respective times.

In this example, the default times will remain as they are appropriate for this application.

Trip Time is the amount of time the call will wait in a tripped position before it notifies the recipient. 

Recall Time is the amount of time the alarm will wait to attempt another call even if the alarm has been tripped. 

Clear Time is the amount of time the alarm will wait to notify the recipient that the alarm is now out of a tripped condition. Clear time can be disengaged by clicking the checkbox to the left named ‘Enable Clear Calls’. This will disable the clear calls for this alarm.

Step 5: Configure Permissions Group

Configure the ‘Permissions’ settings by selecting the user group from the drop down menu. Click on the list below ‘Permissions’ to select which user group is permitted to change this alarm.

In the ‘Group Permissions’ setting selection, select the permissions for the group selected above. In this example, all the users in ‘plowDemoUsers’ are permitted to ‘Edit’ this alarm.

Step 6: Select Call Order

Select a call order by clicking on the gray ‘+ Select Call Order’ button. A call order is the order in which the users will be notified of the alarm.

A new window will open displaying the ‘Call Order Names’ available for selection. In this example, the call order ‘Walker’ is selected.

Click the checkbox next to the ‘Walker’ selection and then click the blue ‘Select’ button at the bottom right of the ‘Call Order Selector’ window.

Call order settings can be accessed by clicking on the Gear icon in the Call Order list box.

Step 7: Select Mask

Click the gray ‘+Select Mask’ button and a new window will open displaying the mask name customization options. In the event that an issue occurs generating either the ‘User Defined Masks’ or the ‘Built in Masks’, please contact the system administrator or OnPing support to resolve the issue.

The mask name is the name that the data is given in OnPing in order to be interpreted into an alarm. Data can be imported in many ways so having a standardized template to configure the data in the same way will increase productivity. Data is interpreted into a Boolean Variable, meaning that there are only two possible outcomes, true or false. 

In this example, the mask ‘IsZero’ is selected from the ‘User Defined Masks’ selection list.  Click the checkbox next to the mask name to select. Navigate to the bottom right corner of the Mask Selector window and click the blue ‘Select’ button to confirm the selection.

Step 8: Select Parameters

To select the data to import to trigger the alarm, click the gray ‘+ target input’ button. 

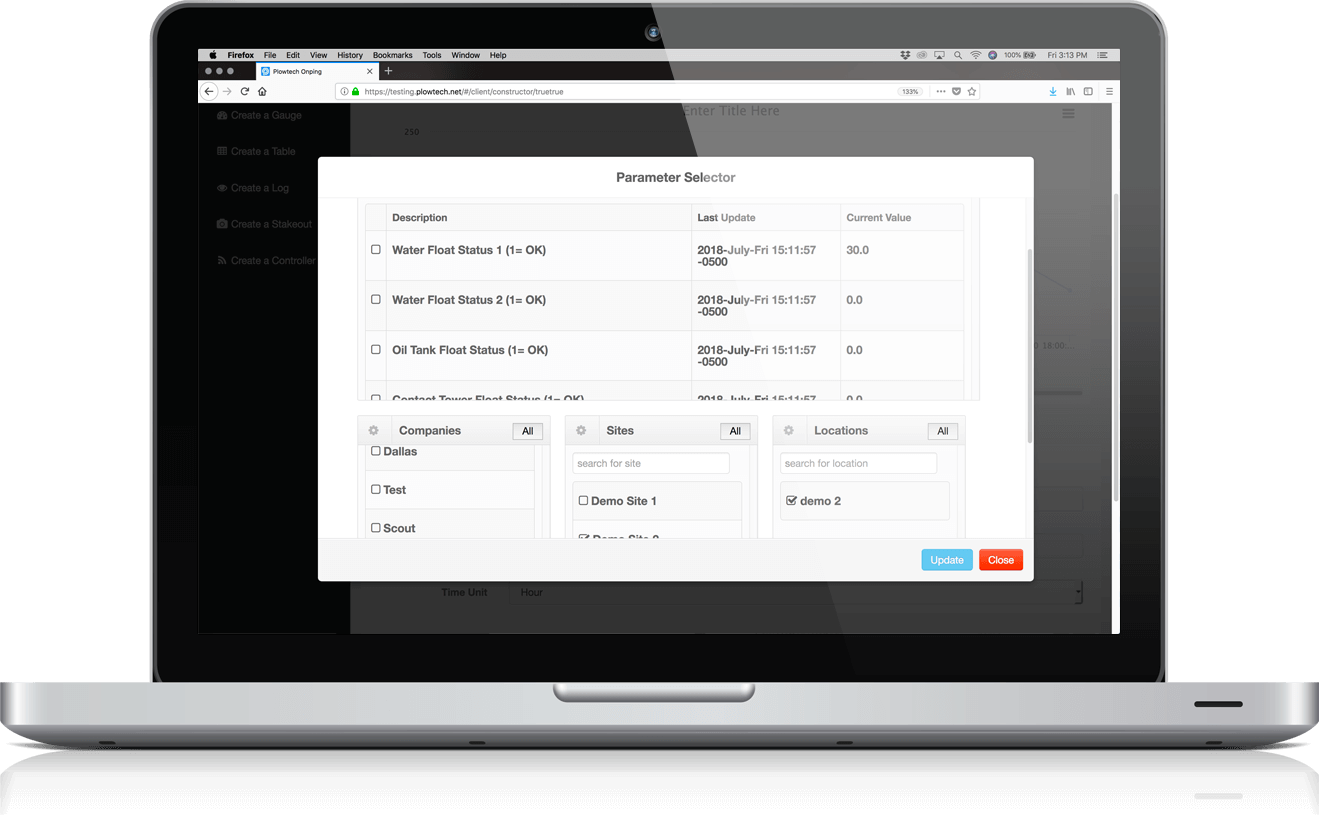
A new window will appear prompting a filtered search for the locations with the desired alarm. Select the Company by clicking the checkbox to the left. In this example the company ‘Plow Demo’ is selected. 

Select the Site for the company. In this example ‘Best Bread Bakery’ is selected. Click the checkbox next to the site name to open the Locations list.

Select the Location for the Site by clicking on the checkbox next to the location name. In this example the location ‘Dough Mixer’ is selected.

A dropdown list will appear below the selection lists in the new window prompting a parameter selection. To perform a quick search, type into the ‘Search parameters’ text bar.

In this example, the parameter ‘Run Status’ is selected. The additional information including the PID/VPID, Description, Location, Result and the Last Updated Time can be viewed in this parameter list.

Click the checkbox in the first column to select the Run Status parameter. Then click the green ‘Confirm Parameters’ button above the parameters list to confirm the selected parameters.

Step 9: Save New Alarm

Click the green ‘Save Alarm’ button at the top left corner of the Create Alarms window to save the new alarm.

An OnPing notification will appear displaying that the alarm ‘Run Status Failure’ has been successfully saved.

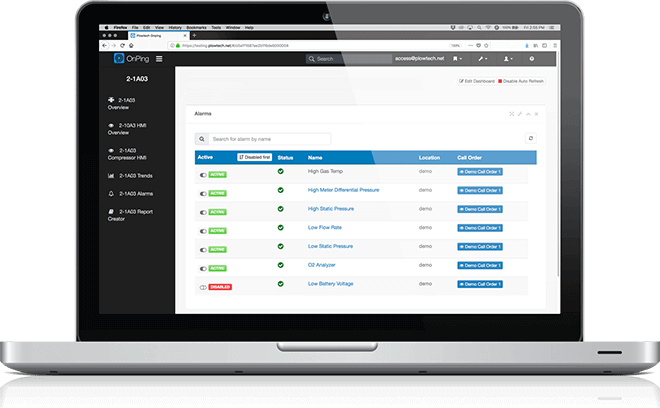
Now when viewing available alarms on the alarm panel, the option for the ‘Run Status Failure’ alarm is selectable.

In more general terms, this alarm reads like this: 

‘When the Run Status ‘IsZero’, the Dough Mixer alarm will trip and call all users, one by one, in the plowDemoUsers group. The alarm will wait two minutes until the alarm will send a notification. The alarm will wait 360 minutes until the alarm will send another notification about this alarm. Or in other words, a retry attempt. The alarm will wait two minutes before the alarm will clear.’

Conclusion #

OnPing enables users to set up alarms to monitor various aspects of their IT environment, from server performance to application usage. Users can create an alarm by opening the alarms panel, naming the alarm, configuring the alarm times, and selecting parameters. The alarm times include trip time, recall time, and clear time, and users can also set permissions, call order and mask names. Once the alarm has been created, users can save the new alarm and receive notifications when an event occurs.

Alarm Creation Terms Defined #

Settings 

Activate Alarm

Activating an alarm setting is the process of turning on an alarm in order to be notified of an event or condition. Deactivating an alarm setting is the process of turning off an alarm so that it will not be triggered and no notifications will be sent.

Use Custom Name

Allow for a sorter notification name for the alarm to display when the alarm sends the message to the recipient. Instead of the location and alarm name, it will display the alarm name only.

Enable Calls Clearing

Enable calls clearing is a feature that allows a user to clear all incoming and outgoing calls for an alarm. This feature is typically used to remove all records of calls made, making it easier to keep track of who was calling and when.

Times 

Trip Time 

The amount of time the call will wait in a tripped position before it notifies the recipient. 

Recall Time 

The amount of time the alarm will wait to attempt another call even if the alarm has been tripped. 

Clear Time 

The amount of time the alarm will wait to notify the

recipient that the alarm is now out of a tripped condition.

Permissions 

OnPing permissions for user groups are settings that determine the level of access to OnPing features and data for a specific group of users. These settings are used to control who can view, edit, and delete data and which features of the software the user can access. 

Call order

Order in which users will be notified about the alarm. This is determined by the order in which the functions are written in the code, as well as any instructions that specify which functions should be called first or last.

Mask name 

Mask name using boolean variables is a process of hiding a name from view by assigning a true or false value to a boolean variable. This ensures that the name is not visible to viewers but still accessible to the code.

Boolean Variables 

A boolean variable is a variable that can take on one of two values, true or false, which are often represented by the numbers 0 and 1. Boolean variables are used to represent logical values such as yes or no and are commonly used in programming languages to control the flow of a program.

Parameters

Parameters in OnPing are settings that can be adjusted to customize the operation of an alarm. Parameters can also be used to control the type of data that is displayed or the level of access a user has to certain features.

Powered by BetterDocs