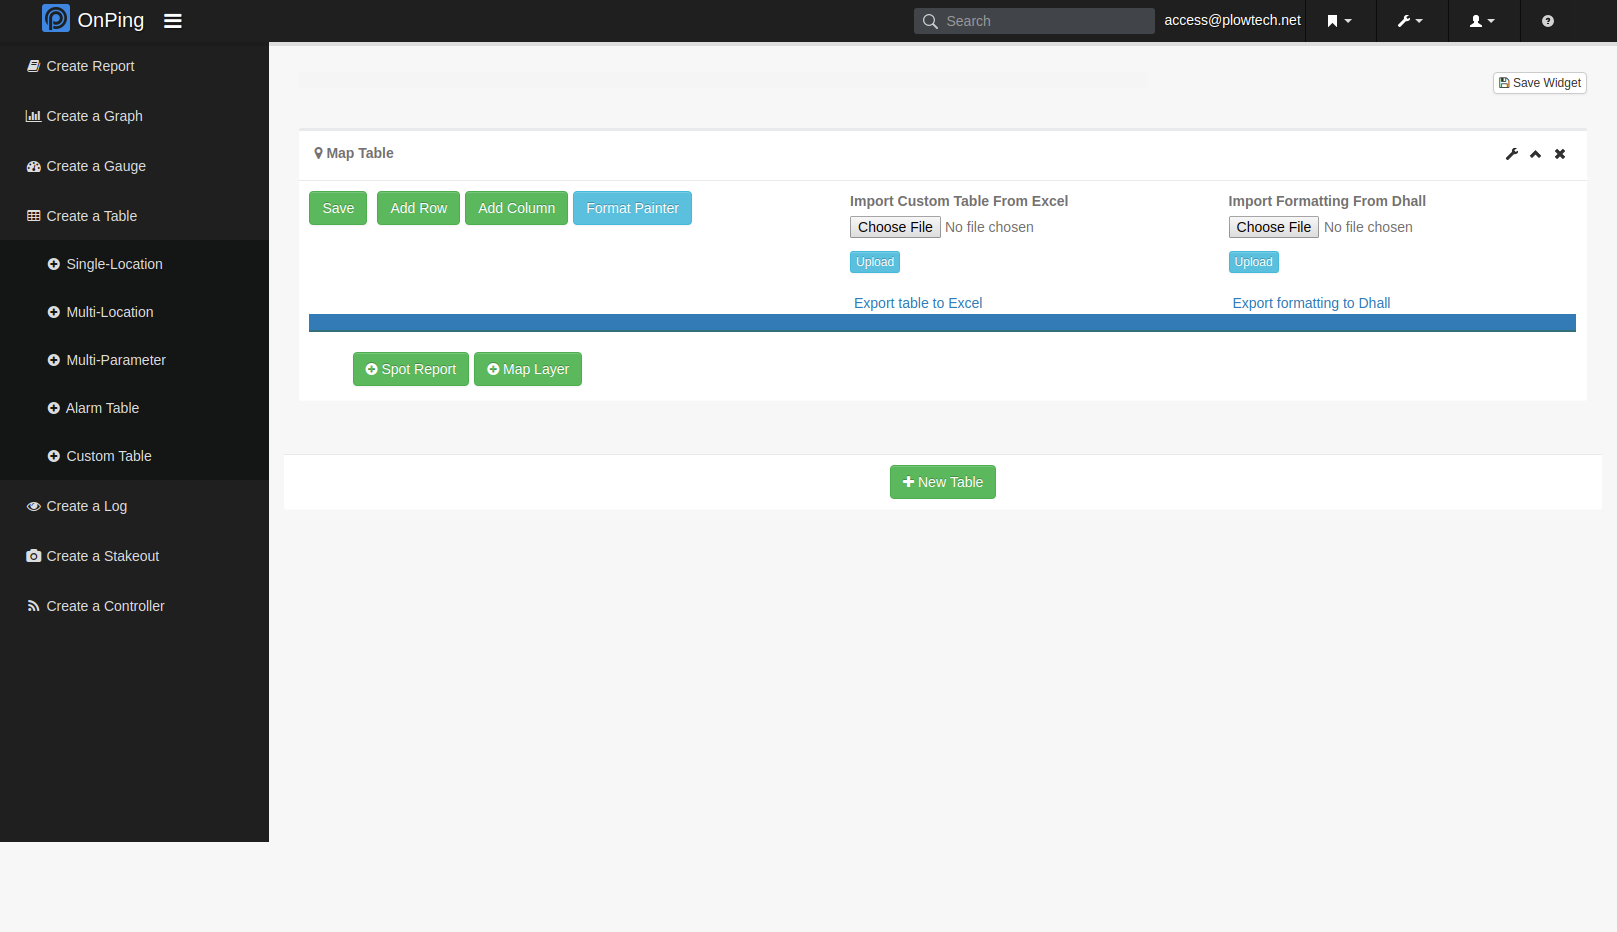
- Create a custom table for the new map layer (see Creating A Custom Table)
- If creating a new dashboard for the table, save the dashboard before proceeding.
- If creating a new dashboard for the table, save the dashboard before proceeding.
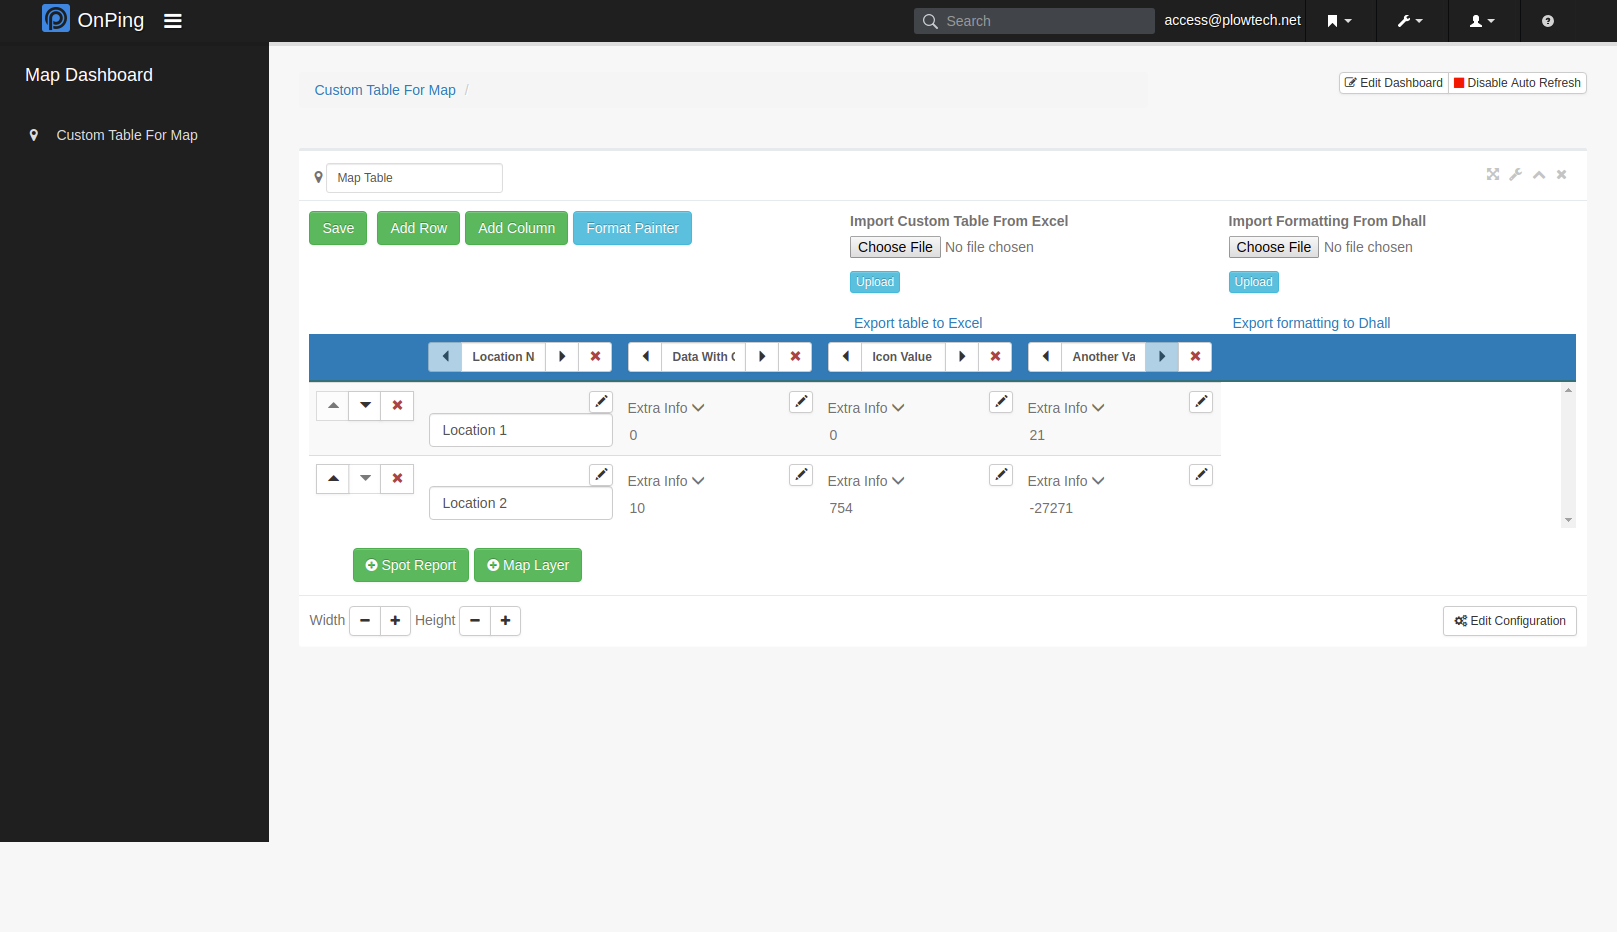
- Add data to the custom table
- Create a column for location names
- Create a column for location coordinates
- Create a column for the value that will determine the icon
- Add additional columns that you would like to see in the “More Info” section of the m

- Save the custom table.
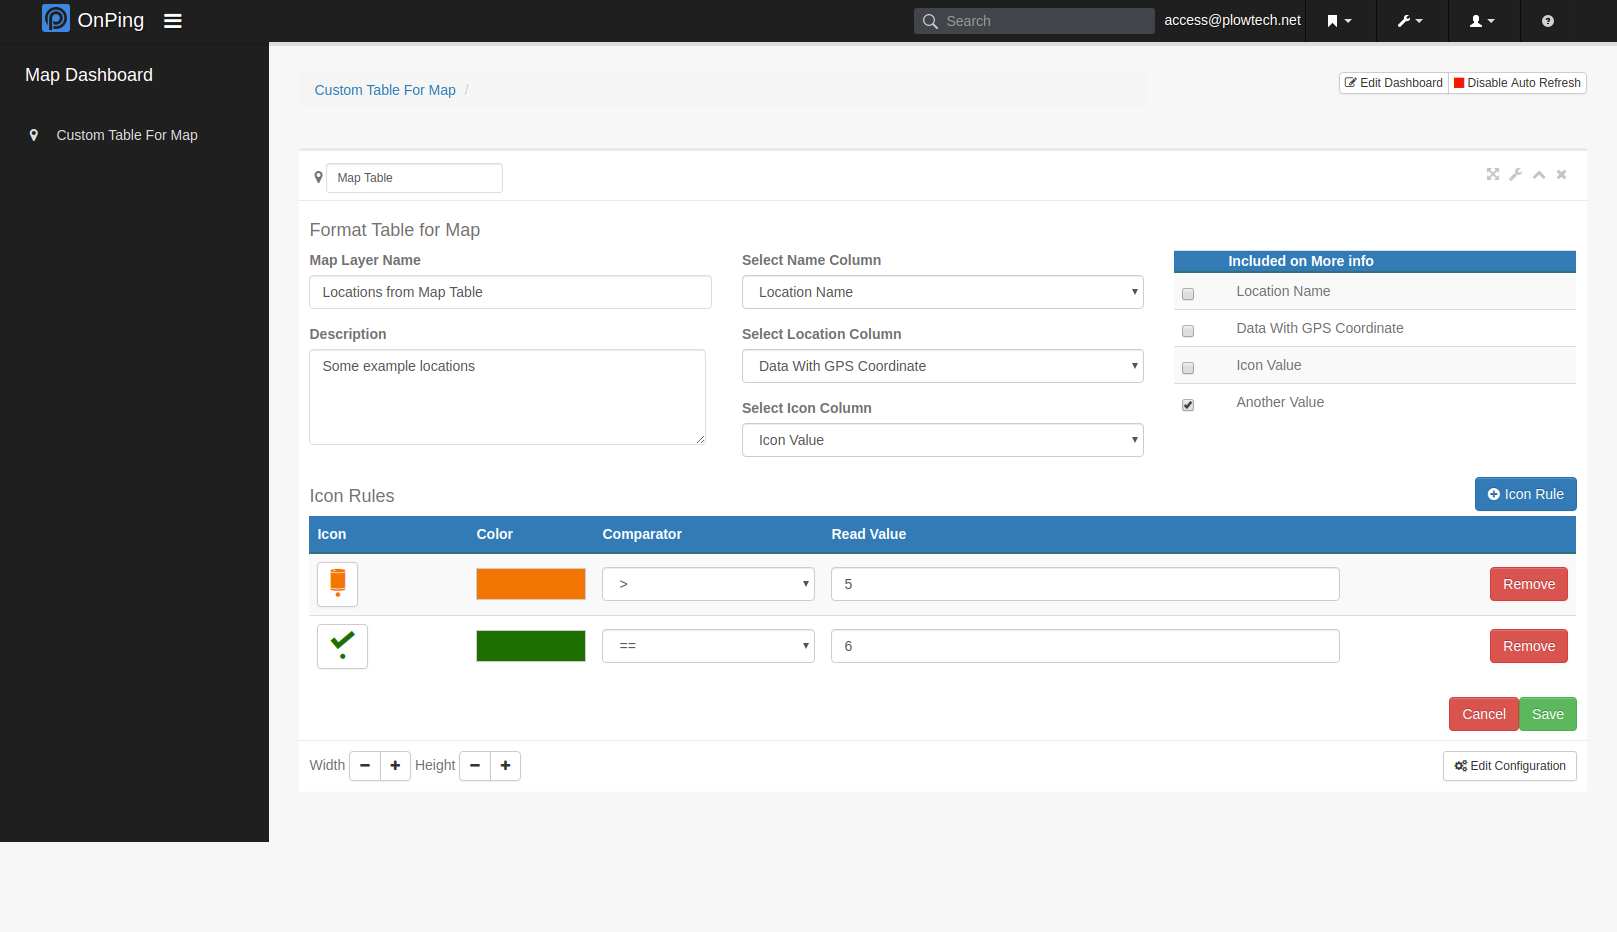
- Click the “+ Map Layer” button below the table.
- Fill in the layer name and description. Select the correct name, location, and icon columns. Check any columns you wish to see in the “More Info” section of the map
- If desired, add any number of icon rules by pressing the “+ Icon Rule” button.
- Each icon rule consists of an icon, a color for the icon, and a condition. For each location, the first condition that the icon column value matches determines the icon and its color. If no rule applies, the location will appear as a black droplet.
- Each icon rule consists of an icon, a color for the icon, and a condition. For each location, the first condition that the icon column value matches determines the icon and its color. If no rule applies, the location will appear as a black droplet.
- Save the map layer with the save button at the lower right of the page.
- Note that if the order of the icon, coordinates, or name columns change in the custom table, the map layer will need to be updated to match.
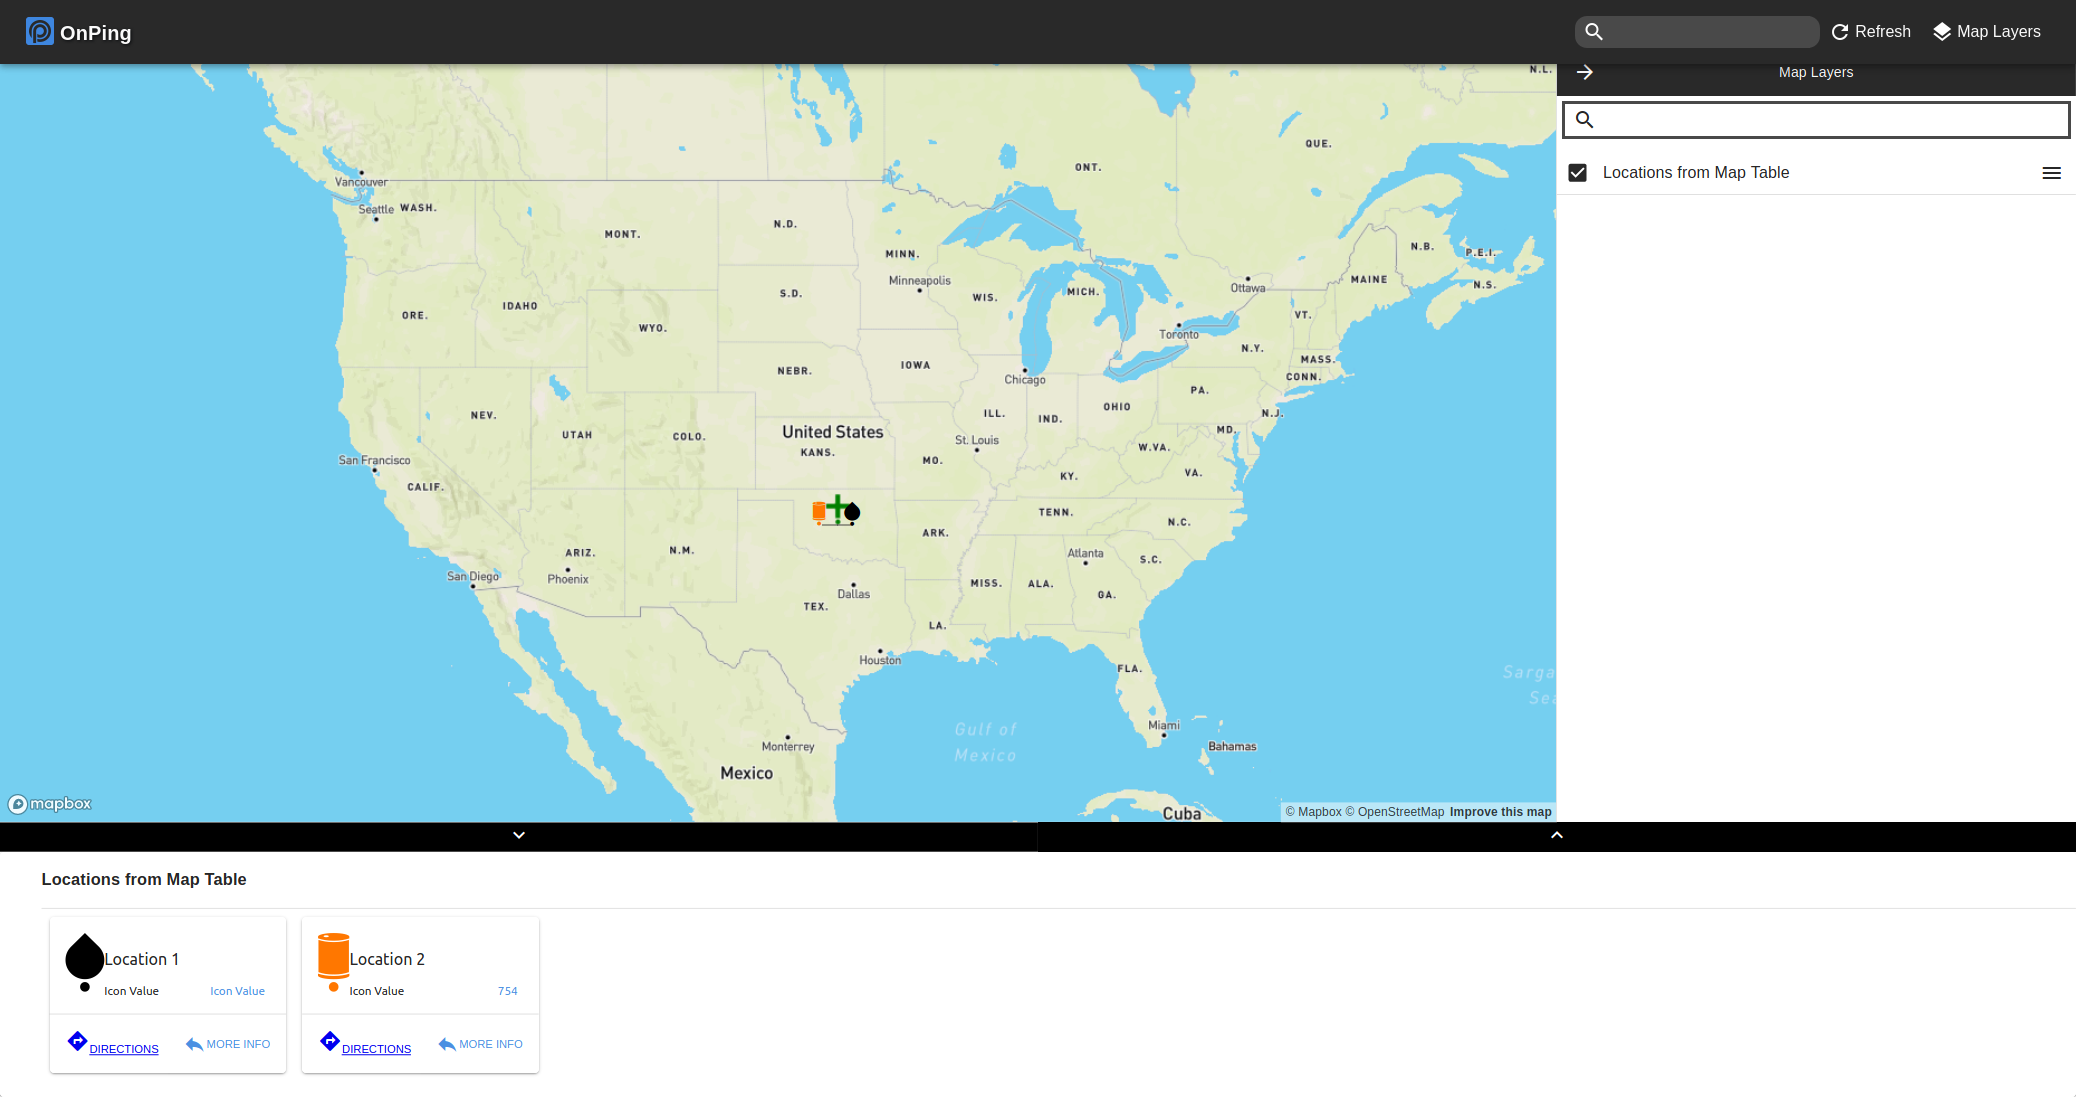
- Navigate to onping.plowtech.net/map to see your map layer.

Create a Map Layer with a Custom Table


Powered by BetterDocs
The Automation Platform That Grows with You
PO BOX 851012
Yukon, OK 73085
© 2025 Plow Technologies. All rights reserved.